
Azure Data Factory - CI/CD
Overview
When starting with Azure data factory, one of the trickier concept to get your head around is setting up CI/CD.
In this guide, I want to simplify and elaborate on a very basic setup to get you off the ground. There is so much more you can do, once you realize that at the very core this is all about just moving your well tested artifacts from a lower environment to production.
When I say basic setup, I mean starting off with just two environment:
- Dev
- Prod

Resources
You will need following resources to test a working setup at your end:
- Azure subscription - to create azure data factory.
- Azure DevOps account - to host your code repo and set up devops release pipelines
Create Azure Data Factory
Create two Azure data factories, representing the two environments - dev & prod. Here is a sample template of how you can go about creating it.
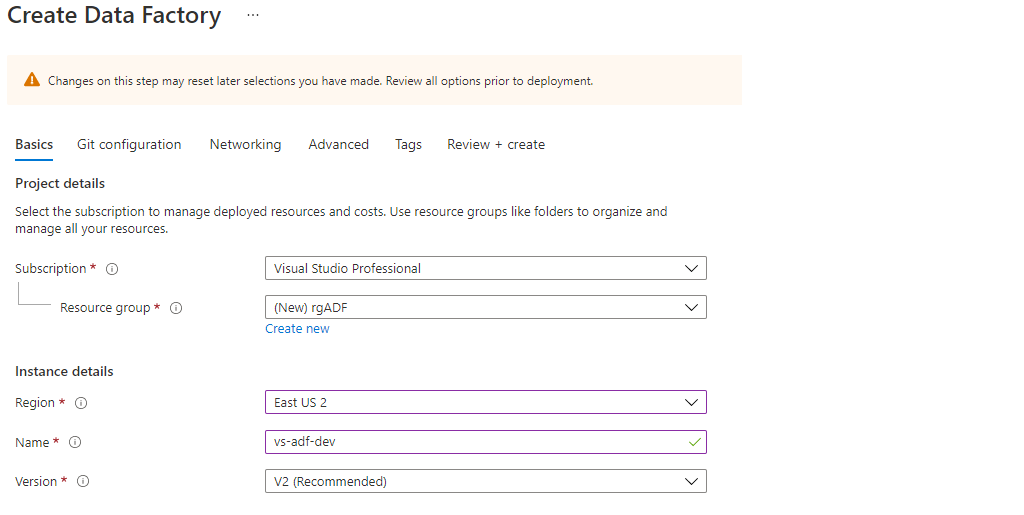
As a best practice, always create related resources in the same resource group. Always set up a naming convention and stick to it for consistency, little time spend in setting this up will pay huge dividends in long run.
Create code repo in Azure DevOps
- Sign in to Azure DevOps
- Optional Steps
- Before you can create a project/repo, go to Organization setting > Azure Active Directory and connect to your default directory.
- To make sure you are in the right org directory, click on your account name towards the top right hand side corner and click on Switch directory, make sure Default Directory is selected.
- Create a new project.
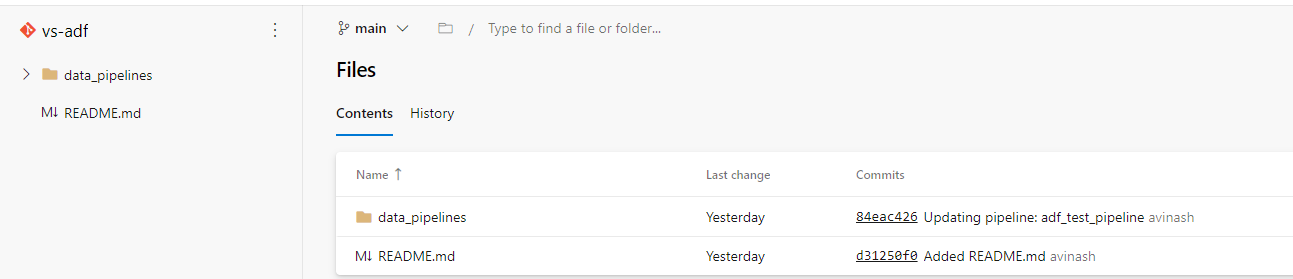
- Create and initialize a new code repo.
- Within your code repo, you can choose to create a directory structure that suits your needs. In my case I created a directory data_pipelines at the root.
Configuration
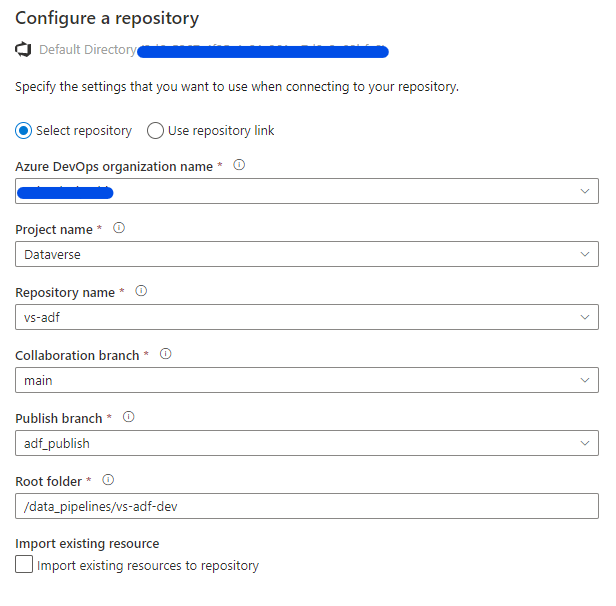
Git configuration in dev data factory
Why do we need Git configuration in dev data factory only ?
Because usually in your dev environment, more than one developer will be working to develop pipelines. If you have git integration, every developer can work independently on a copy (feature branch) of your main/master branch and merge code back to main/master branch when ready. This also allows code to be securely saved in the repo without the risk of losing your work or overwriting someone else’s work.
To setup Git configuration on an existing data factory, go to Manage > Git configuration
Git configuration is not required in Prod Data factory, to move code from Dev to Prod we will use Azure DevOps Release pipeline.
Deployment process
- Open Author panel in your Dev data factory (after completing Git configuration).
- You can choose a working branch from the top menu bar, when you are starting select the option New branch

- You can then do your development in this branch, complete testing and when ready create a pull request to merge the code from your working branch to main/master branch.
- Once approved and merged, you can open Dev data factory again, select main/master branch and click on publish button. This will push your code to a special branch within your repo adf_publish.
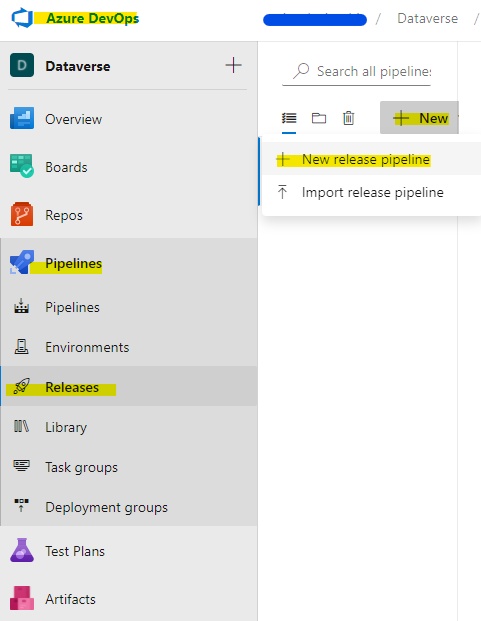
ADO Release Pipeline
This is the final step, which will push the code from adf_publish branch in your repo to Prod data factory.
- Open Azure DevOps repo and create a new release
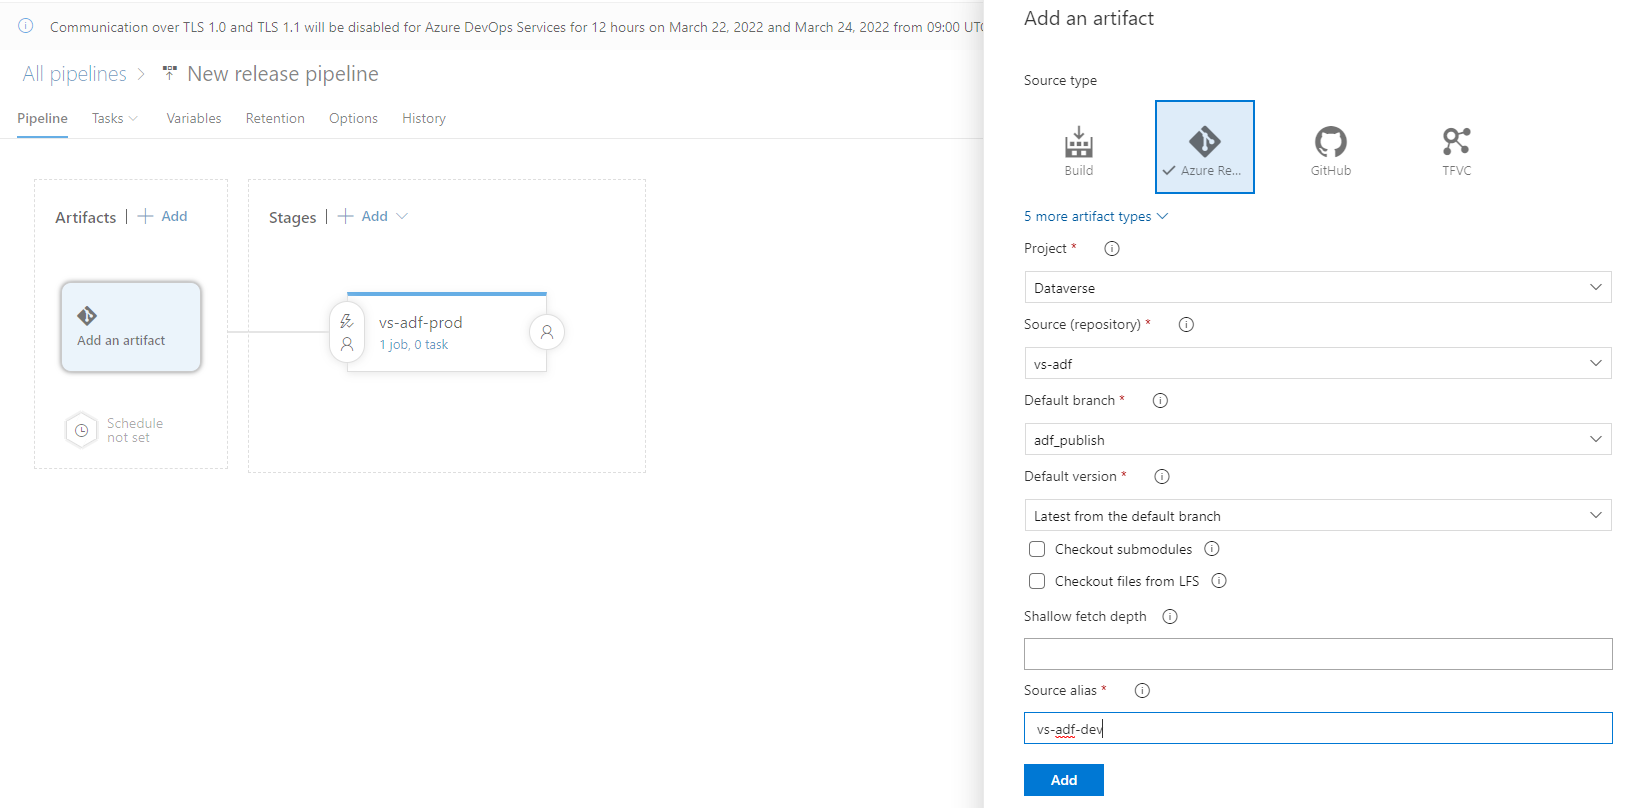
- Add an artifact
- Select Empty job
- Give a meaningful name to the Stage
- Add artifact as show in the snapshot below
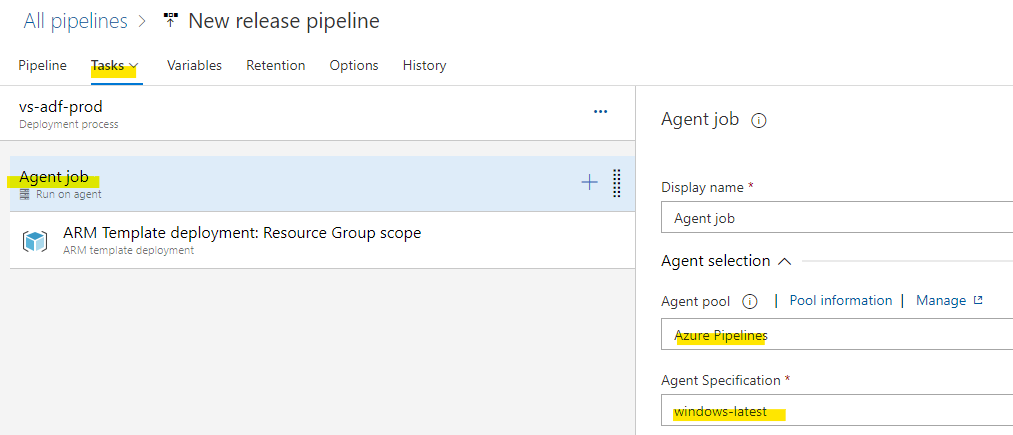
- Create Task
- Configure Agent Job
- Add a task of type ARM template deployment to Agent job
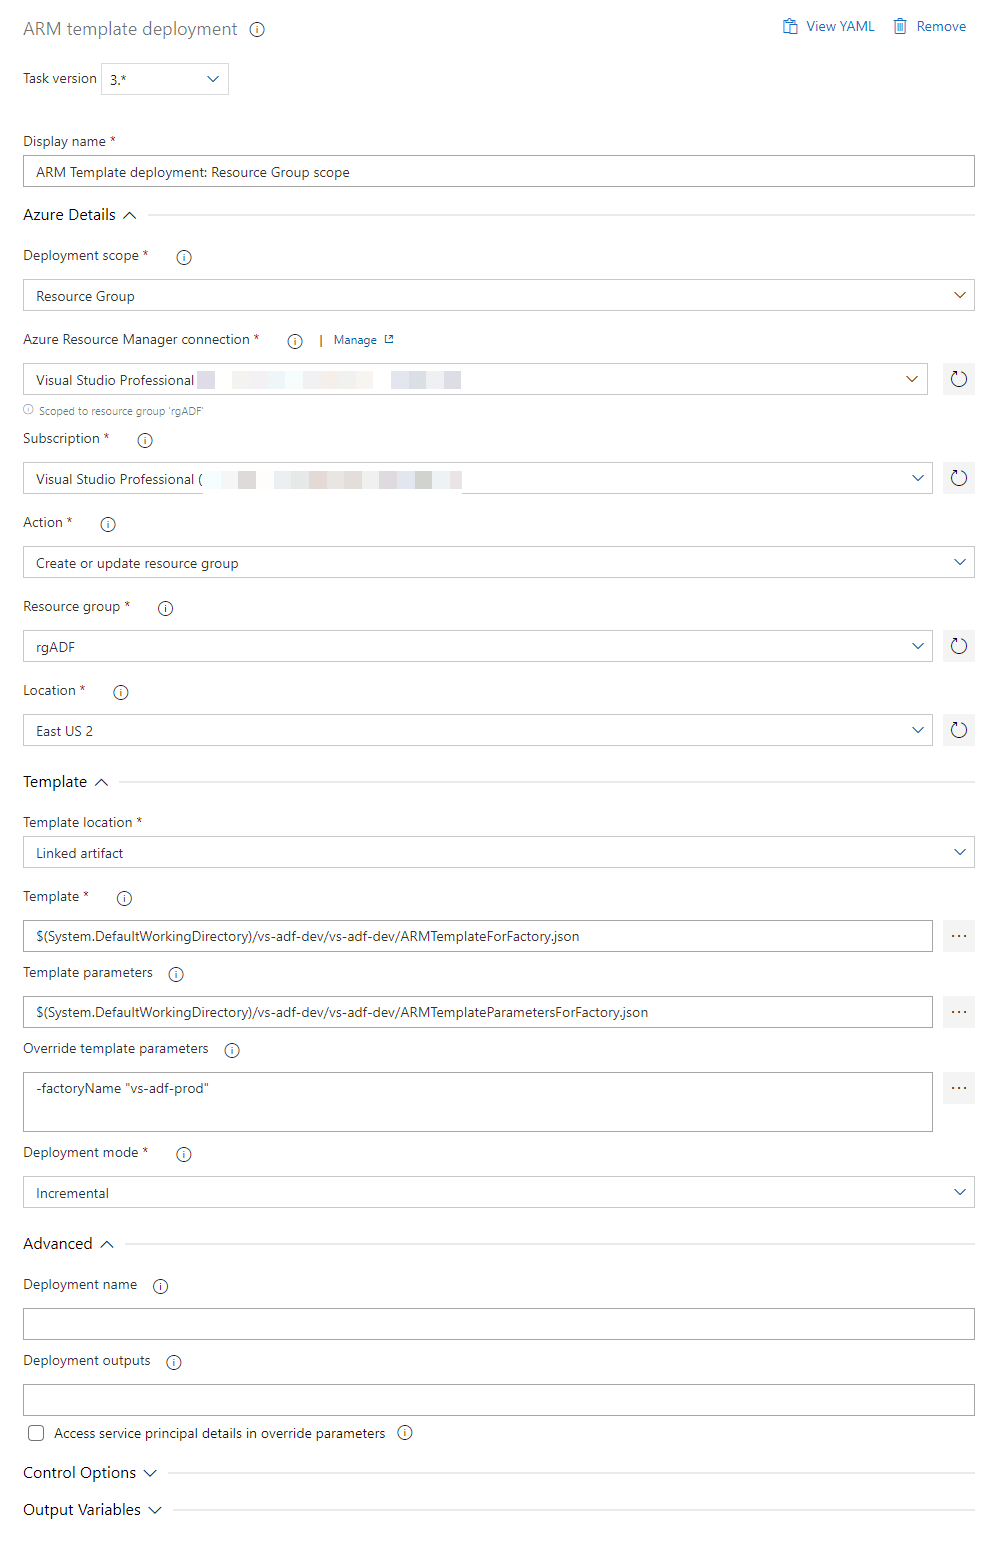
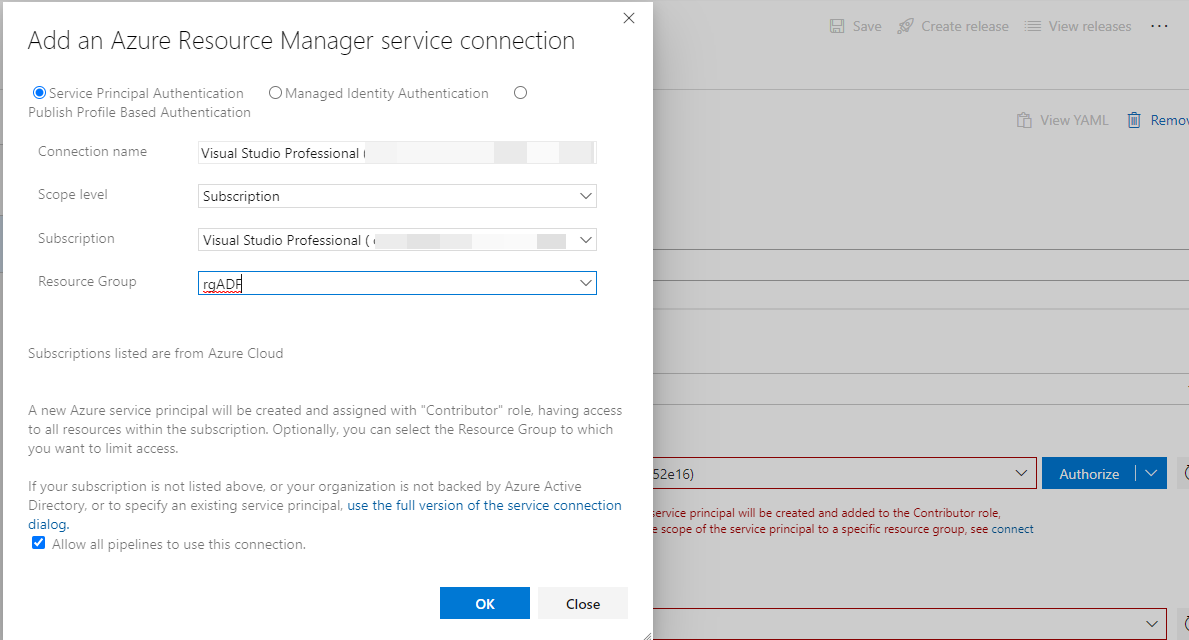
- Set up Azure Resource Manager Connection
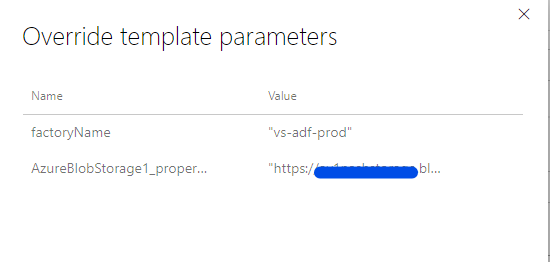
- Override template parameters - this is where we will specify the name of our production data factory.
- Configure Agent Job
- You can now create a New release and select option Deploy > Deploy multiple to start deployment.
- Once successfully completed, you can open your prod data factory to verify deployment.
Deployment error
One common error that you can encounter is not having free parallelism grant. As of writing this article you have to request it using a Microsoft form
Error message: No hosted parallelism has been purchased or granted. To request a free parallelism grant, please fill out the following form https://aka.ms/azpipelines-parallelism-request

Comments